Kitchen note
My DIY Woven Seat Cover
You’ve probably noticed that weaving has become incredibly popular lately. Woven wall art seems to be everywhere, from handmade markets to home décor collections. Aside from making one of those simple loop potholders when I was a child, I had almost no experience with weaving.
Nina Sterling
Cook
Bench note
The full story and useful tips are below.
Shelf
Plant kitchen
You’ve probably noticed that weaving has become incredibly popular lately. Woven wall art seems to be everywhere, from handmade markets to home décor collections. Aside from making one of those simple loop potholders when I was a child, I had almost no experience with weaving.
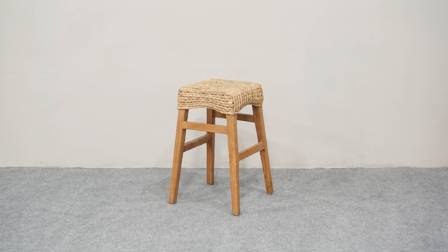
I didn’t really have a need for another wall hanging, either. But recently, I came across an old wooden stool that was definitely ready for a refresh. Rather than simply painting it, I decided to try something different and make a circular woven cover for the seat.
Creating the Circular Loom
Before getting started, I looked through a couple of weaving tutorials to get a better understanding of the process. I initially planned to begin weaving directly in a circular shape, but there were actually a few important steps that needed to happen first.
I made my own circular loom from a piece of cardboard and then created the warp threads across it. Once the loom was prepared, I began weaving around the center and gradually worked outward.
The first attempt actually progressed quite well. I spent a considerable amount of time on it and was nearly finished when I realized that I wasn't satisfied with the result.
Why I Started Over
There were two main problems with my first version. The overall design felt too plain because there wasn't much color beyond the temporary rainbow-colored sections I had added.
I also wasn't happy with the spacing. As I worked closer to the outer edge of the circle, the individual sections became increasingly far apart. The result didn't have the dense, even appearance I had envisioned.
After thinking about it for a while, I decided to dismantle the entire piece and begin again. It was difficult to take apart so much completed work, but I knew I would be happier with the final result if I corrected the problems instead of settling for something I didn't love.
Adding More Warp Threads
For my second attempt, I added three additional threads between every pair of the original warp threads. These thin white strands formed the structure around which I wrapped the thicker yarn.
There was one spot where two threads ended up together because of an accidental extra strand. Surprisingly, that mistake turned out to be useful because it gave me an easy visual marker for knowing when I had completed one full round.
That led to one of my most useful tips for circular weaving: always mark your starting point somehow. You don't need anything complicated. A small knitting stitch marker, a contrasting piece of thread, or another simple marker placed along the outer edge can make it much easier to keep track of your rounds.
Introducing Color Into the Weaving
When I restarted the project, I kept using the same primary yarn but combined it with a thinner strand in a contrasting color. As the weaving progressed, I introduced different colors into the main yarn and incorporated additional strands to create more visual interest.
There is also a simple trick to remember whenever you change yarn colors: don't tie the two yarns together. Instead, leave a short tail from each strand and deal with those loose ends on the back of the finished piece later.
This keeps the front of the weaving cleaner and prevents unnecessary knots from showing through.
Using the Soumak Technique
For most of the seat cover, I used a weaving technique known as the soumak stitch. Rather than simply passing the yarn alternately over and under the warp threads, this method involves wrapping the yarn around the individual stitches.
At the beginning, I wrapped the yarn around two stitches at a time. As the stitches became larger farther out from the center, I changed to wrapping around just one stitch.
The soumak technique took noticeably more time than a basic over-and-under weave. I did like the fact that it provided excellent coverage and concealed almost all of the warp threads.
However, if I were making another circular piece like this, I would probably use more of the traditional over-and-under weaving method and reserve the soumak stitch for selected sections.
Finishing the Edge
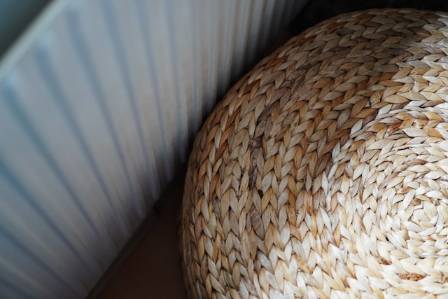
Once I reached the outside edge of the circular weaving, I turned the entire piece over so I could work from the back.
Near the center of the piece, I carefully clipped two stitches at a time. I then brought those two stitches together near the outer edge and secured them with a square knot.
I continued working around the entire circumference until all of the stitches had been secured. This created a neat finished edge and prevented the woven structure from coming apart.
Cleaning Up the Back
After securing the edges, there were still plenty of loose yarn ends on the back. I used a tapestry needle to guide those loose strands toward the center of the piece.
Once all of the loose ends had been woven into the back and the structure looked tidy, I trimmed away the excess threads.
I also took care of the yarn tails created whenever I changed colors. Those ends were tucked securely into the back so that they wouldn't interfere with the appearance of the finished seat cover.
Adding Extra Embellishments
Although the weaving itself was technically finished, I wasn't completely satisfied with the center. It looked a little too simple compared with the rest of the design.
So I threaded my needle with a pink accent yarn and added a few woven details through the center section. This small addition gave the middle a little more personality.
You could take this finishing stage even further by adding decorative elements such as beads, sequins, or other small embellishments.
The important thing to remember is that finishing the weaving doesn't necessarily mean the creative process has to end. Once the basic piece is complete, there are still plenty of opportunities to personalize it.
A Relaxing Craft Project
Overall, this circular weaving project was a really enjoyable experiment. I found the repetitive motion surprisingly calming, especially when I wasn't trying to rush through it.
It's also the kind of craft that works well while relaxing in front of the television. I worked on mine while watching the final episode of Downton Abbey and listening to podcasts.
Along the way, I picked up several useful weaving techniques and learned what I would do differently next time. Most importantly, I ended up with a colorful little round seat cover that gave my plain wooden stool a completely different look.
Plans for the Wooden Stool
I'm still not particularly fond of the original wood finish on the stool itself, so I may give the frame a makeover as well.
I'm considering using gray chalk paint, although I've never actually worked with chalk paint before. If I decide to go that route, it will become another small experiment and another opportunity to transform this otherwise ordinary stool.
More from the kitchen
· en
How to design your wooden ring box of walnut wood
Freya Willow

· en
The Most Beautiful Waterfront Cities in the World
Maelis Ford

· en
Nineteen Incredible Butterfly Facts That Will Completely Change How You See Them
Holland Sophia

· en
Top-Tier Bookshelves to Elevate Your Home Library
Nathaniel Thomas Carrington
· en
The Best 7 Storage Furniture Pieces
Caleb Martin

· en
The Arctic Tern: Master of Long-Distance Migration
Henry Dawson